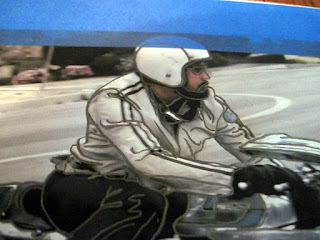
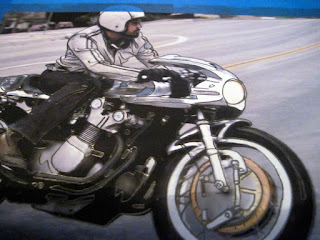
So today I'm tracing the images and transferring them to the watercolor paper. Now that the stencils are made from the print out and taped onto the paper, this is a breeze.
You can begin wherever you like, but I usually start out with the important parts of the painting. The subject matter in the foreground is the rider and his motorcycle. These are the time consuming parts, but also the most interesting, so be careful. Try to stick to tracing the shapes or "blocks" of color, and a few contour lines here and there will give you good reference points for later. Also, you don't have to press very hard when tracing, so try not to poke through the paper. (NOTE: If you used charcoal or very soft graphite (3B-8B) on the back of the printed image as the transfer material, you don't have to press very hard at all with the pencil. If you used something harder (graphite from 8H-B) then a little more pressure will be needed.)

Now that the bike and the rider are all traced, look over it quickly and make sure that nothing was missed. If you need to retrace anything, now is the time to do it, if not, scan the background and look at the objects.

Softly, scribble underneath the bike to add in the cast shadow.
The road lines in the foreground are in focus with the rider, so try to match the shape accurately without drawing too much attention to it. A little looseness will be good in this area to keep the attention on the rider and keep the viewer's eye from wandering too much.
Notice how everything is blurred? The rider is in motion in this picture, so you need to trace the objects in the background loosely. It'll give you a good head start when trying to paint a blurred background. When tracing the background, it doesn't have to be perfect, just enough to get the basic shapes out of it.
Now that you're done tracing, try to peel back the tape at a fairly sharp angle, while pulling out to the side. This will give you a chance to minimize ripping or tearing the paper and will also preserve the printed image should you need to start over with a new stencil.
Once you have the printed image removed from the paper, take a look at your transfer. The basic shapes are all outlined and there are a few contour lines to give you an idea of the depth of objects and the placement of shadows throughout. Also, if you missed an area here or there like I did (the handlebars, and the back wheel), this is an easy fix. Choose two objects close to the edge of the printed image and try to line them up with the traced image. Be careful as this can be kind of a pain to undo if you're a little off, but once the images are aligned again, just retrace the areas you missed :)
That's all for now. I'm going to go back and trace the other two stencils from the previous post.
Next will be the inking process, which is fairly easy and along the same lines as the transferring steps in this post. The big difference is that the inking process allows you to start being creative :)


No comments:
Post a Comment